Across all social media platforms, posts with images perform better than posts with just text.
For example, did you know that images earn 2.3 times more engagement on Facebook than text posts? Or that tweets with images get 150% more retweets than tweets without?
Besides being more eye-catching and presenting more opportunities for brand recognition, images simply play well with how humans are wired. Our brains only need about 1/10 of a second to interpret an image, while reading 200 words can take the average person an entire minute.
If creating exciting, easily understandable content is your goal, you can’t afford to not have a robust social media image strategy. In this guide we’ll cover some best practices for using images on social media, and how to create professional-looking images in Fanbooster using our Canva Integration.
Table of Contents
Start your free 14-day Fanbooster trial
Best practices for creating social media images
There’s a few tried and true methods for a successful social media image strategy. Leverage these principles as you create visual content in Canva to grab attention, garner engagement, and make your images useful to all.
Do set goals
Before you begin creating a social media image, decide on your goals for the post. Website traffic? Shares? New followers?
The type of image you create should match that goal. Content that gets the point across that you’re having a sale may drive traffic, so a text based, informational image would work for that goal.
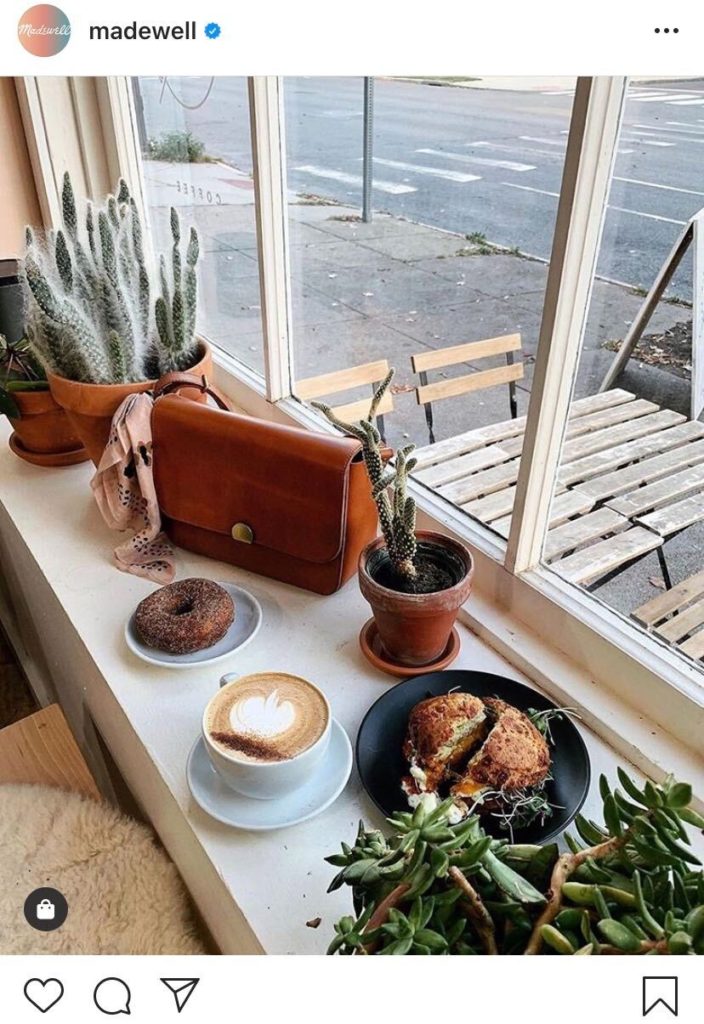
If shares or likes are your goal, the image should evoke an emotional response and mimic what users typically want to see or share in their feed with their connections. For example, these two Instagram posts from Madewell have completely different designs—one informational, one aesthetically pleasing and exuding likability.

Don’t use the same images for every site
Different social networks display images using different dimensions, so what may have worked on Instagram will not work on Twitter. Avoid looking sloppy or cutting off crucial information by adjusting your images to create separate media files with the following dimensions:
- Facebook: 1200 x 630
- Instagram: 1080 x 1080
- Twitter: 1024 x 512
- LinkedIn: 1200 x 628
- Pinterest: 1000 x 1500
For more images size recommendations, such as images used for your page branding or link preview images, learn more from this guide.
Do make sure images match your branding
Before you spend time creating one-off social media graphics, spend some time deciding and documenting your brand guidelines. This will help your brand recognition as social posts are shared among your audience and to potential new followers.
At minimum, you should have guidelines around:
- A color palette
- Fonts
- Design elements (e.g. does your brand use realistic photography or strictly animation? Straight orderly lines or whimsical wonkiness?)
- Which version of your logo corresponds with different usage situations
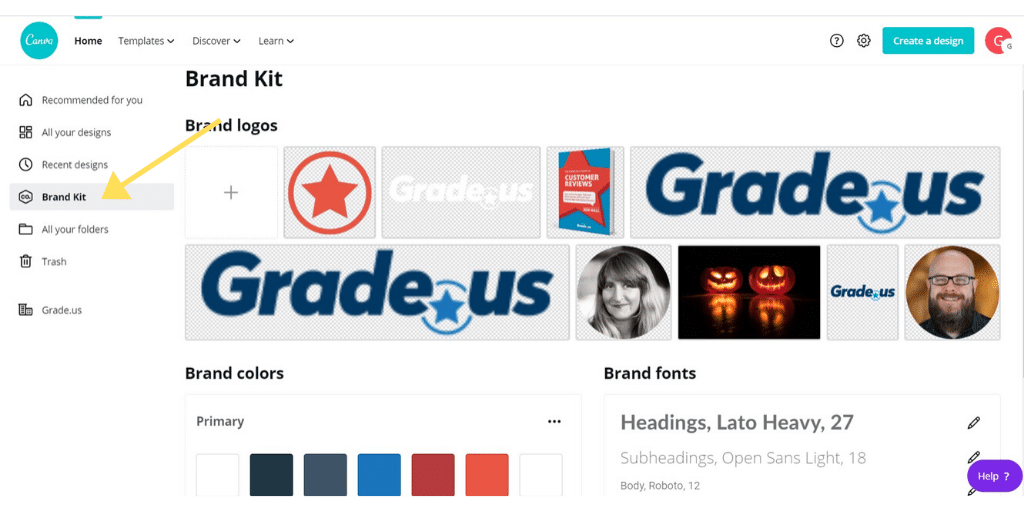
Once you have the basics down, you can always build out your brand book with details dictating every design choice and keep your image strategy tightly locked down. One you decide on your brand guidelines, you can use the “Brand Kit” section in Canva to select your choices and have them available for easy access as you create future designs.
Pro-tip: If your business produces a lot of blog content, consider creating an image template for all of your social media blog promotion posts. This can be a great workaround that avoids using stock photos and getting lost in the noise of all the other similar featured images out there.
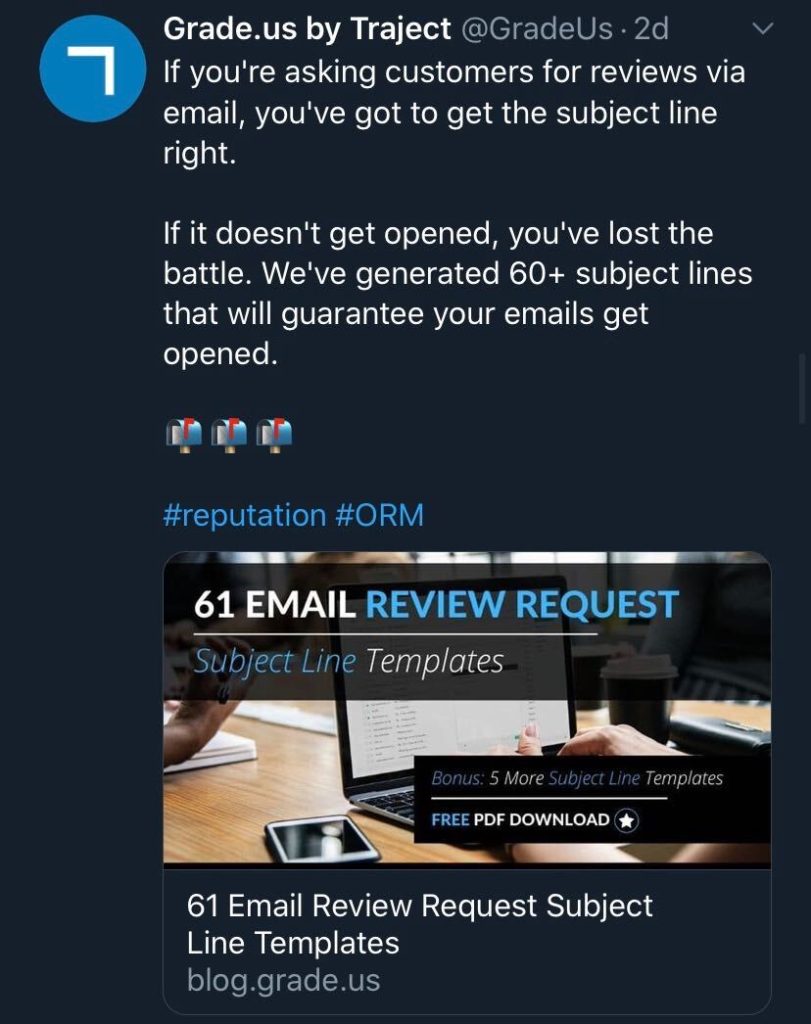
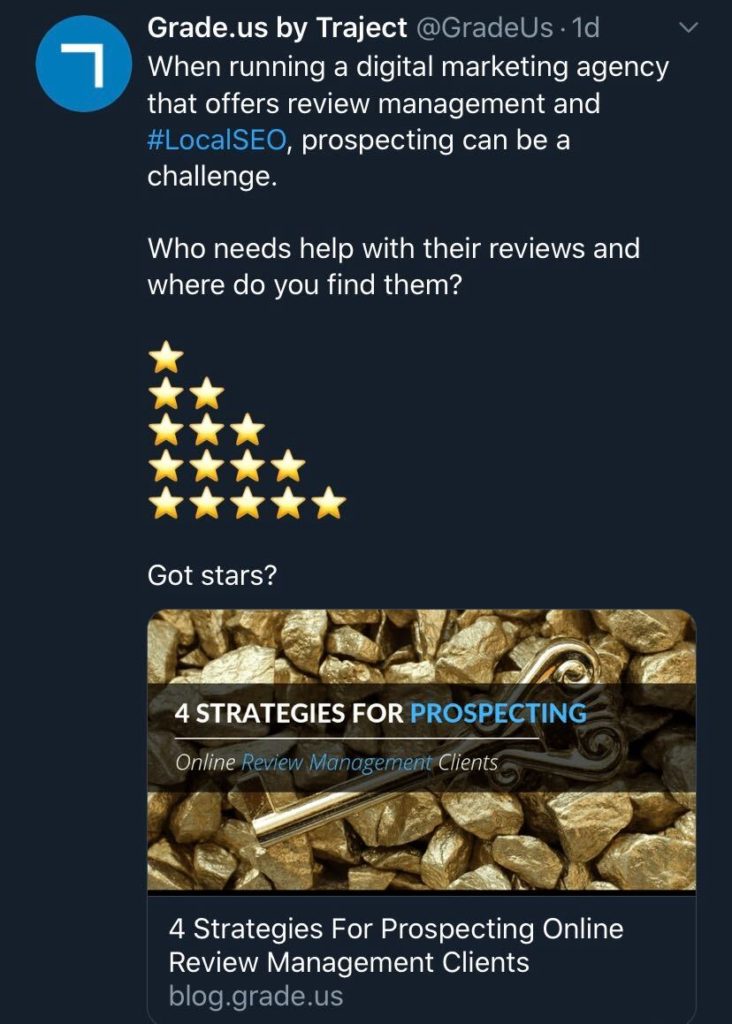
The Grade.us blog promotion images are a great example of using a consistently branded and easily repeatable approach. Each one has a relevant background image, similar branding elements like logos and borders, and then highlights the title of the content.
Do include a clear call to action
Decide on the action you want your audience to take from the image you create, and then provide them an easy way to complete that action directly from the social post.
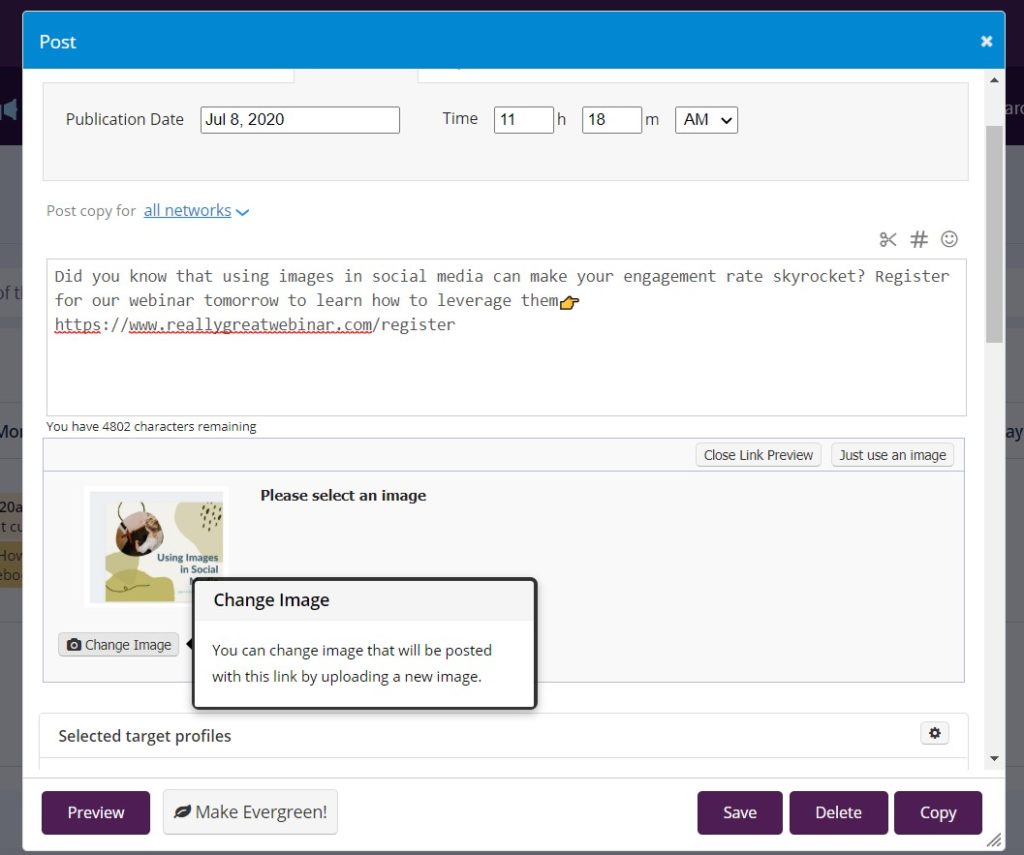
Often a link is the easiest way to guide users in your CTA. In Fanbooster, you don’t have to choose between a link preview and a custom image. Add your link to your post as you normally would, and when the link preview populates, click “Change image.” This will replace the link preview with your custom graphic in your post.
Do keep accessibility in mind
Following digital accessibility guidelines will allow users with disabilities who may have lowered vision or use a screen reader to interpret your image.
One easy way to make your images more accessible is to add alt text or a caption. When you are about to schedule a post with an image in Traject Social you will be prompted to enter a caption, but you can also edit all of your captions by opening the image in your Media Library.
You should also only use colors that have a color contrast ratio that meets WCAG guidelines at a minimum level of 3:1. This standard does not apply to elements that purely appear for decoration (so yes, you can still have light yellow in your brand palette), but for all elements meant to convey information, make sure your contrast is sufficient.
Because colors are one of the more difficult things for users with disabilities to perceive, even if you use the proper contrast, never rely solely on color to convey meaning. Adding labels or using alternative methods like shapes or graphs can make your image more accessible.
Do visualize data
Using images to convey facts and figures attracts more attention than text only, and they are 3 times more likely to be shared on social media than documents.
The key to capitalizing on that attention is to not make data visualizations overwhelming or overcomplicated. Create a killer infographic by focusing on only 1-3 of your most actionable data points, or share an attention grabbing graph that only illustrates 1 point.
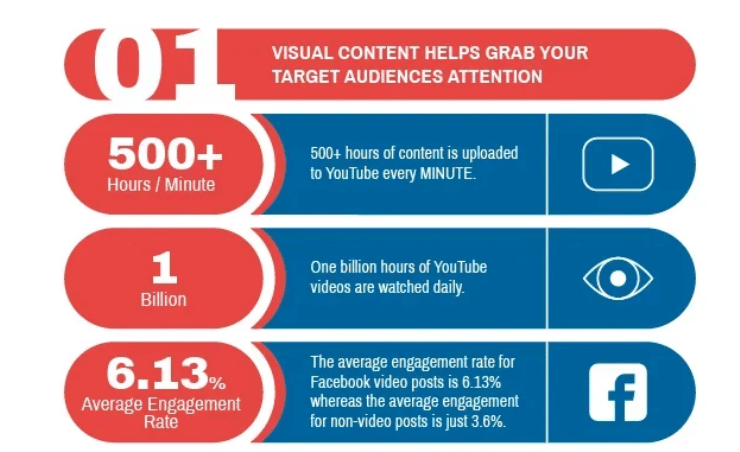
Pro-tip: You don’t have to be performing research studies to gather data to visualize. As long as you link to your source or otherwise give them credit in your image, you can visualize any data you choose.
As you’re curating industry articles to share on your social media or in blog posts, stop and ask yourself if you could sum up the statistics in the article with an eye-catching image instead of sharing the written content. Not only will you stand out among all your competitors who simply shared the same article over and over, but your post will be much more digestible and sharable to your audience.
How to create images in Canva using Fanbooster
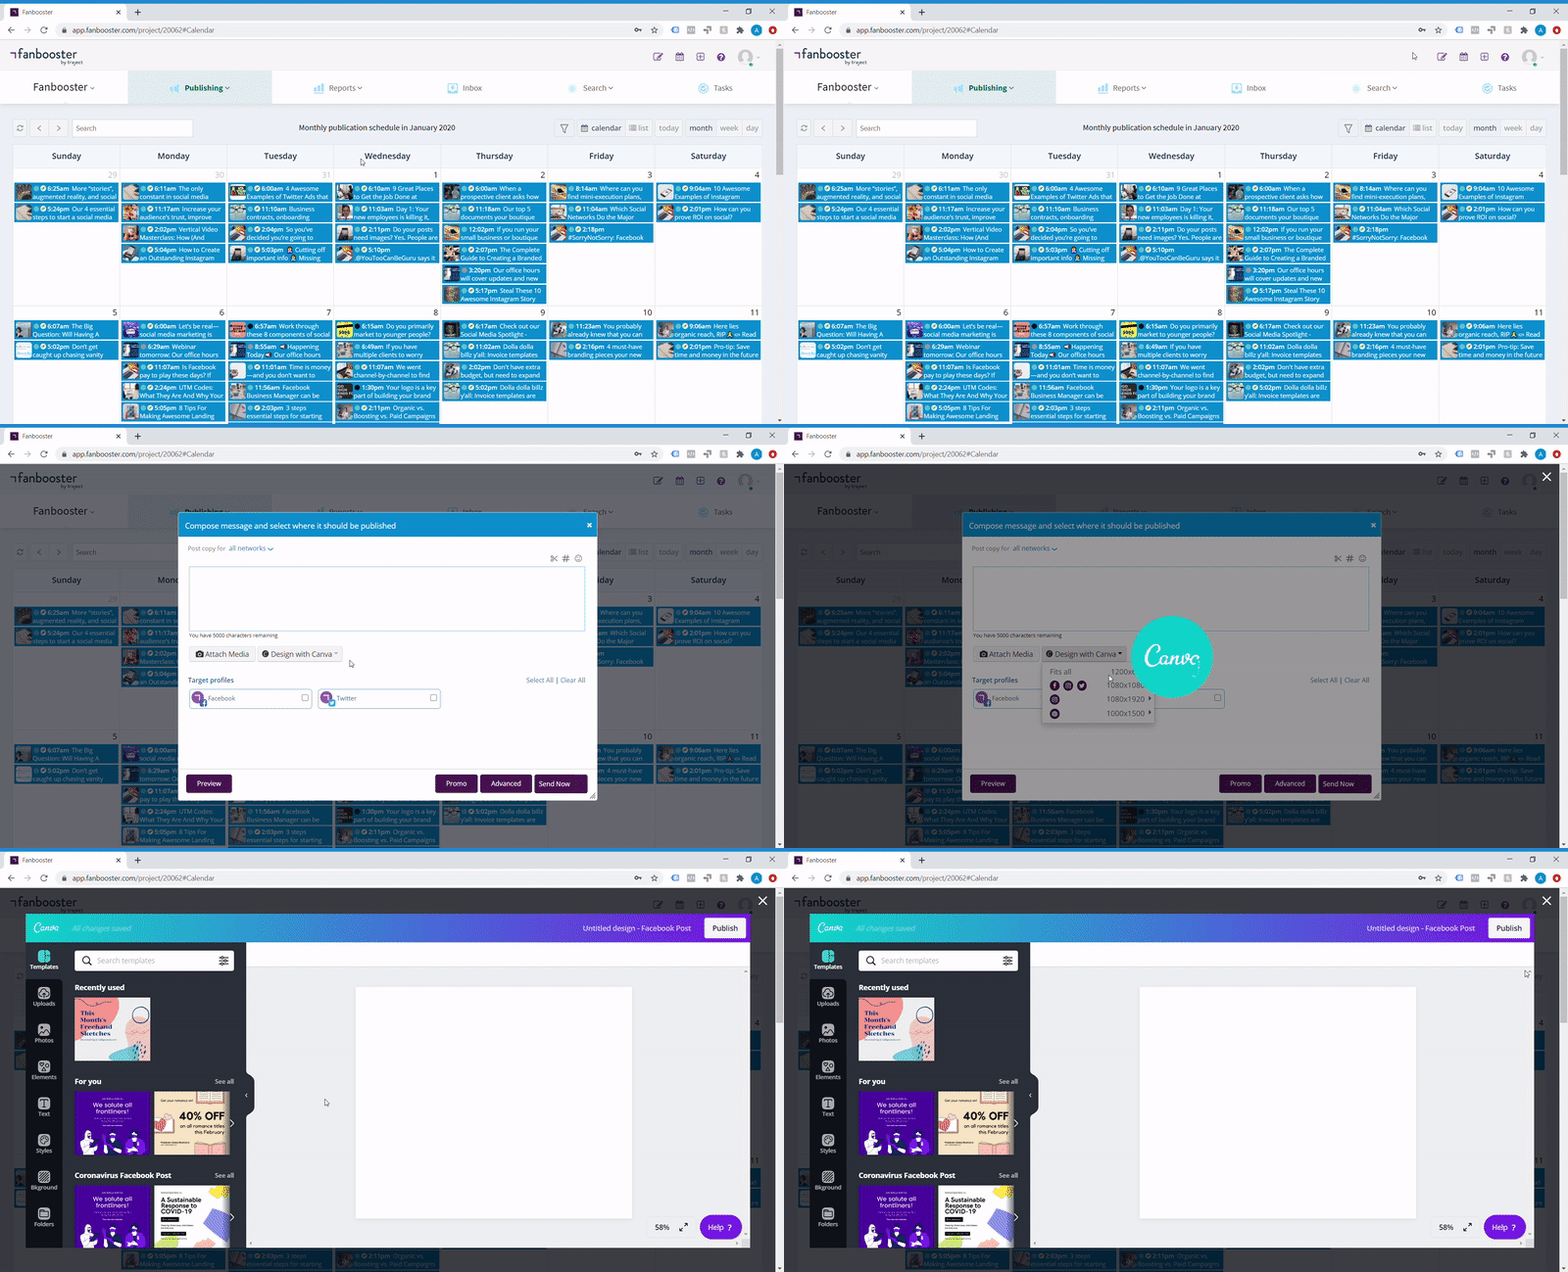
You can create high-quality visuals powered by Canva directly in Fanbooster. Follow these steps to create, edit, and access all of your social media images in the media library for future content.
- Open the post composer as you normally would as you begin to create a new post
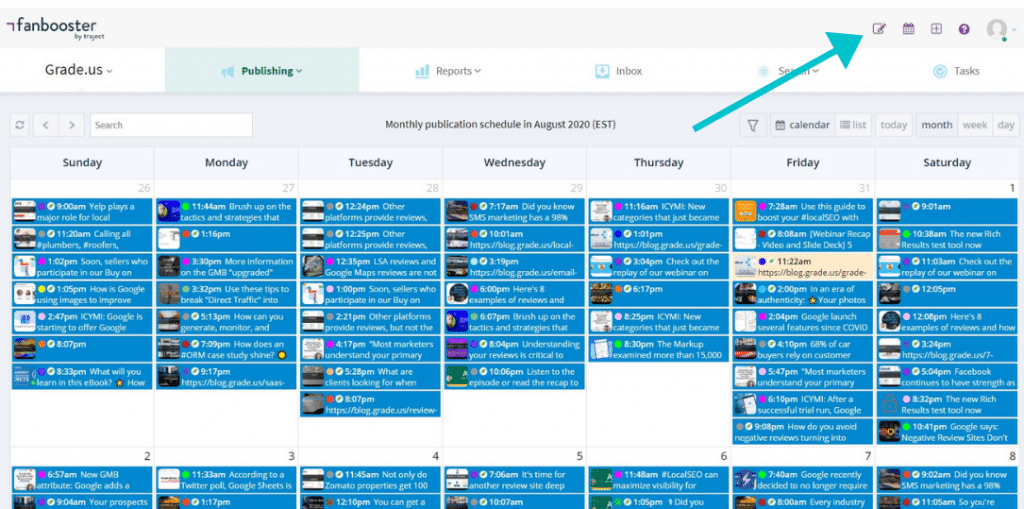
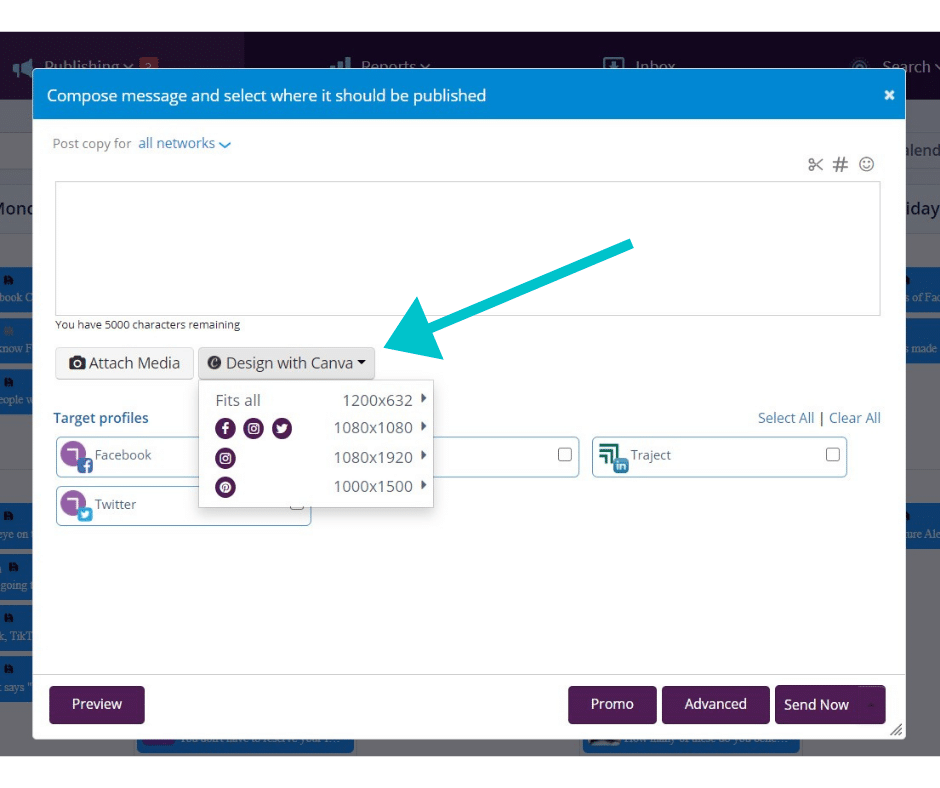
2. Click “Design with Canva” underneath the text box. This will open a dropdown menu of the most commonly used social media image sizes, with icons letting you know which social networks are compatible with each set of dimensions. Click on the one that best fits your project.
3. This will open Canva and you will be prompted to create a Canva account or sign in to your existing account.
If you have an existing account, all of your past Canva creations will be pulled in and available for you to use or edit through the Fanbooster integration. If the existing account is a Pro or Enterprise account, your status and previous purchases will be maintained as well.
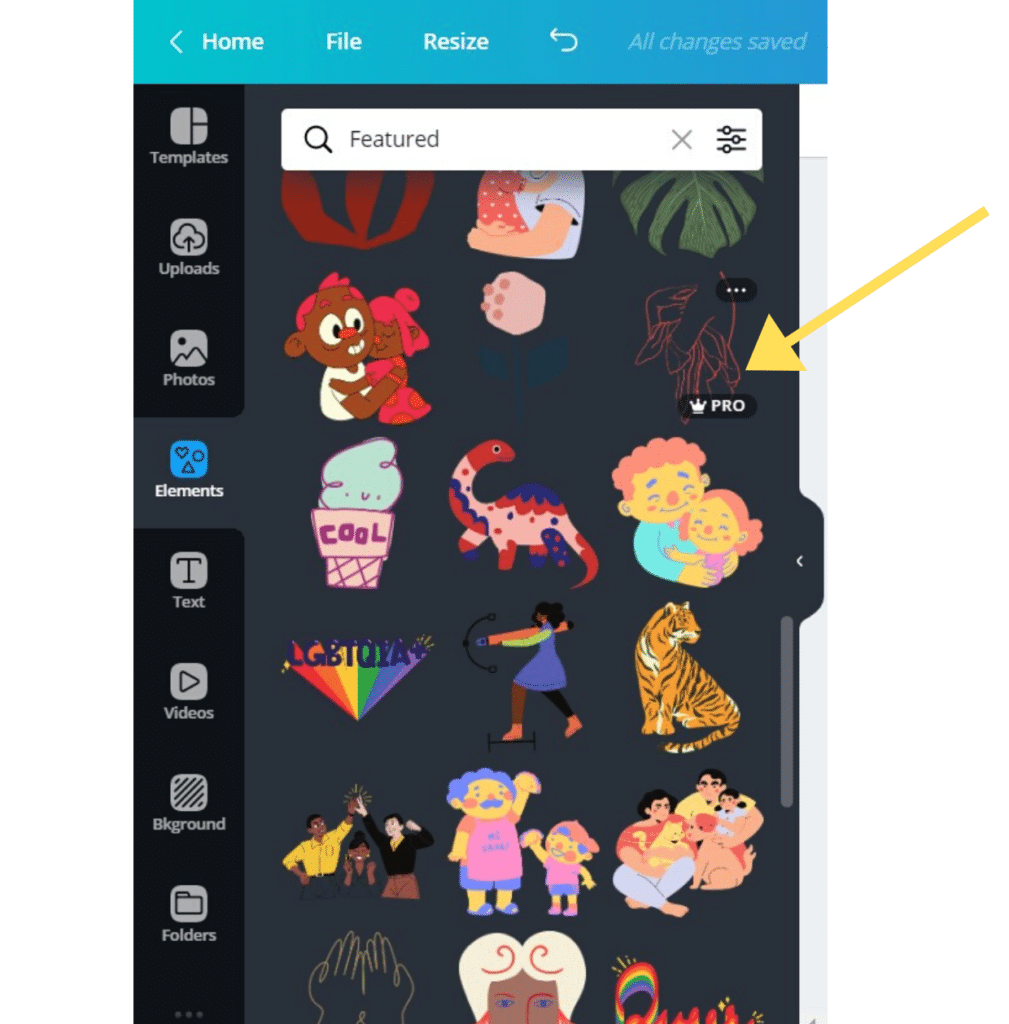
If you’re using a free account, be aware that there are certain premium templates and elements that Canva requires you to purchase before use. You’ll see this content labeled with “Pro” when you hover over it.
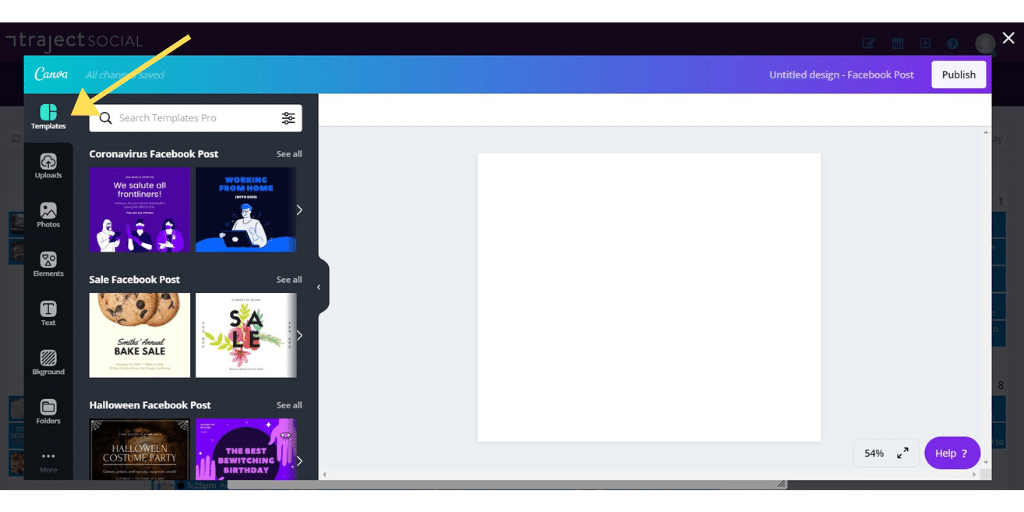
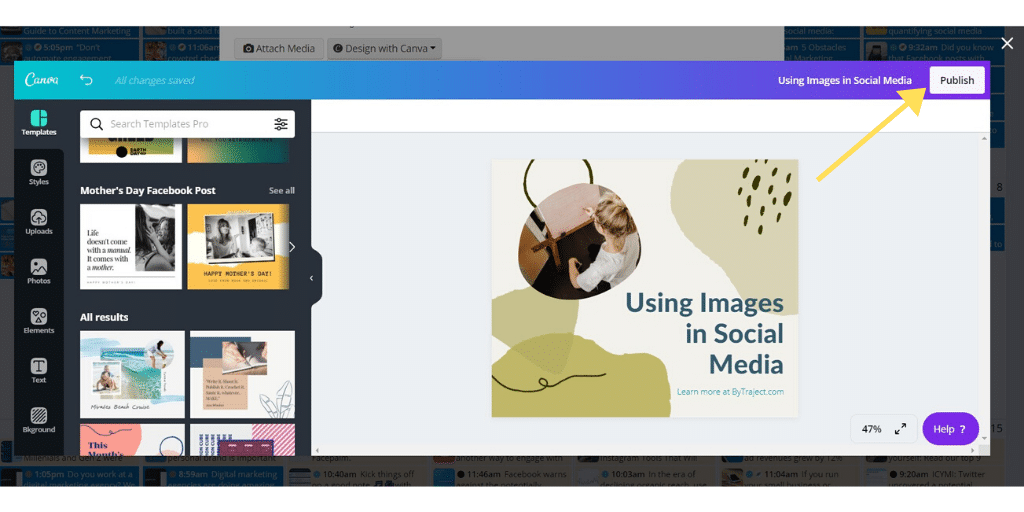
4. For the quickest and easiest way to professional images, use one of the templates provided on the left side bar and then edit the information to match the information you want to convey in your social post.
You’ll notice that whichever image dimensions or corresponding social network you chose when you opened the Canva integration, the templates shown will already be pre-sized to match that social network.
5. Once you’ve selected a template that matches your brand look and feel, edit it by clicking on elements of the design that you want to change. To make changes go more quickly, you can select the “Styles” option and select color palettes or font groups that match your branding.
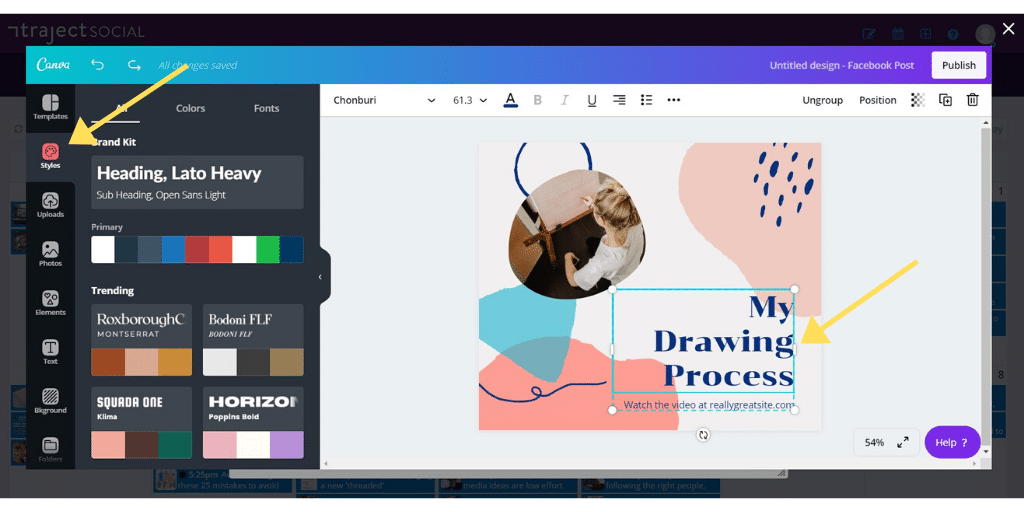
If you haven’t already created these style presets for your brand, open your Canva account on your desktop and select “Brand Kit” to create them.
6. Once you’ve completed your image, click “Publish” in the top right corner.
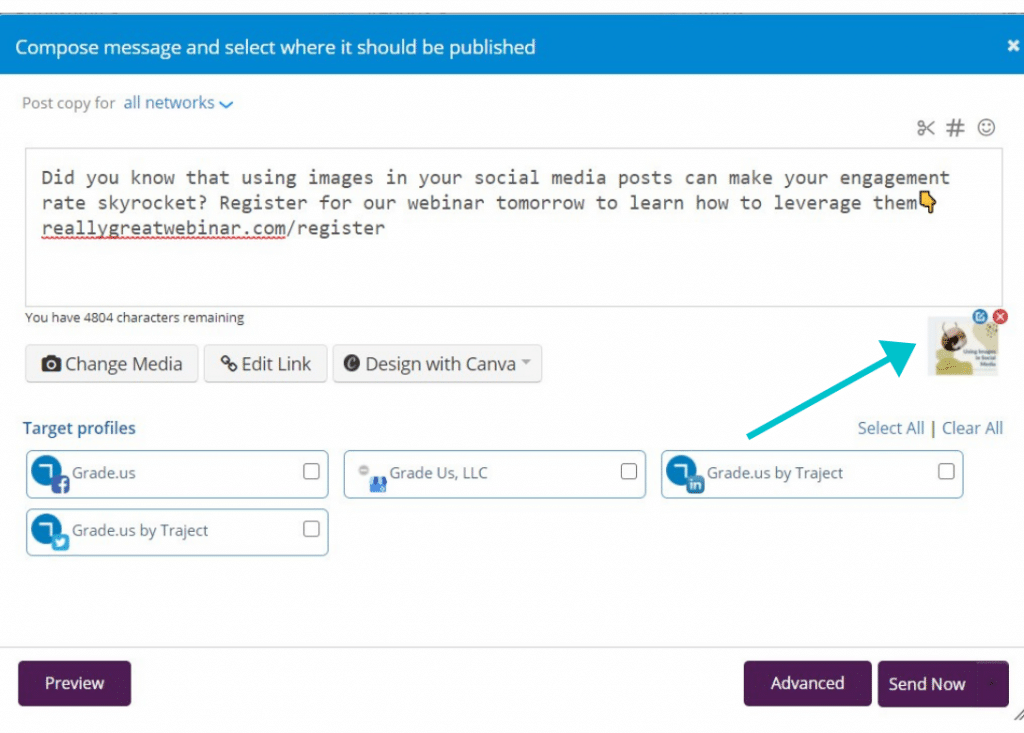
7. You’ll be brought back to the post composer, where you can continue creating your post. You should see your attached media underneath the text box. You can now continue selecting profiles and scheduling the post as you normally would.
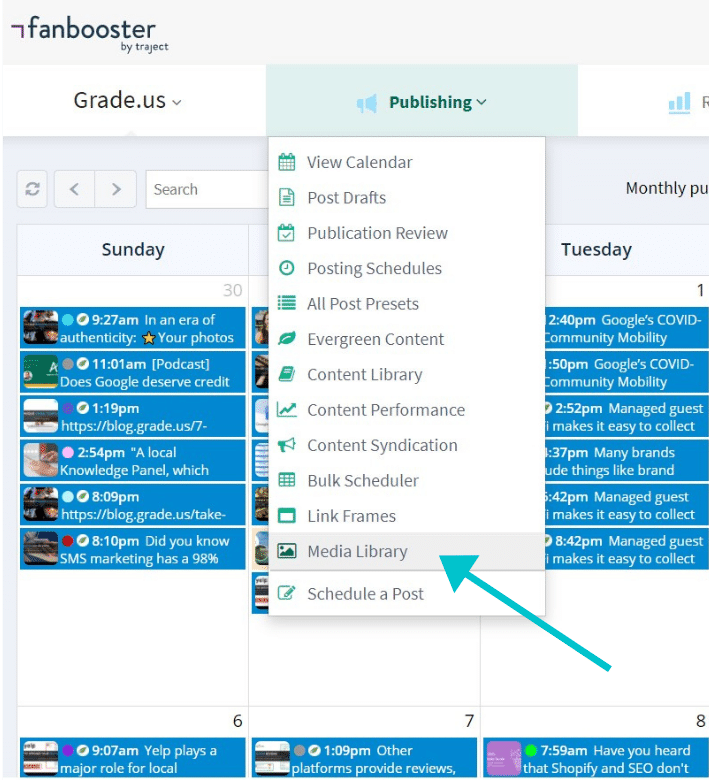
8. Once you click “Publish” in the Canva integration, your images will automatically be saved in your Fanbooster Media Library. Access the Media Library under the Publishing tab in the main navigation bar.
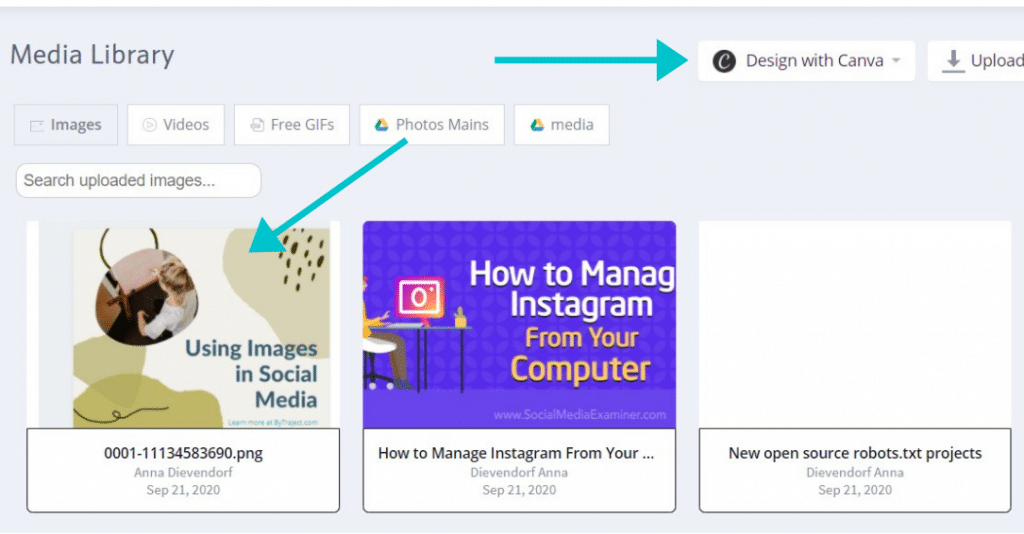
9. In the media library, you’ll see your Canva creation, as well as an alternate way to access the Design with Canva button.
If you want to edit your media, click on it here.
This will open a window where you can select Edit, which will reopen the Canva window
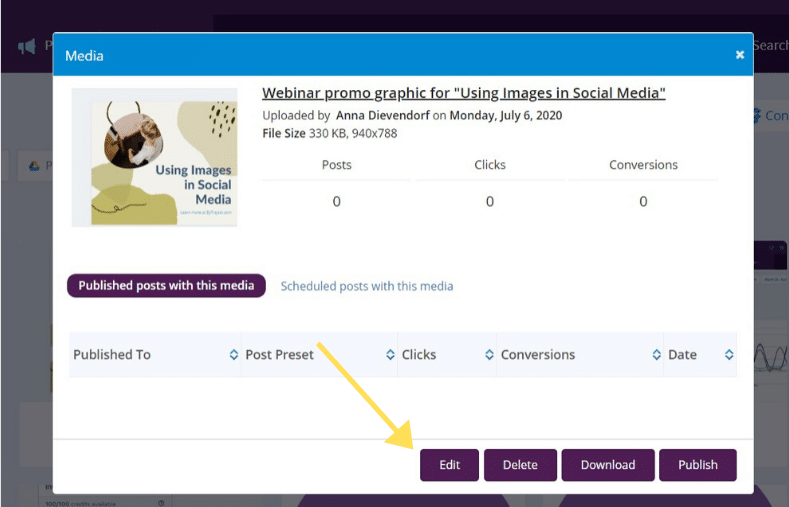
Bonus: If you edit an image using these steps, all future posts associated with that image that you’ve scheduled will be automatically updated with your edited media.
Final Thoughts: Upping your social media image game with Canva and Fanbooster
Images have the power to convey information quickly and present it in a palatable, sharable way. By following the best practices above, you can turn almost any information your audience needs to know into eye-catching imagery that boosts your engagement rate.
The trick to a successful image strategy on social media is to make your visual content look polished, professional, and consistent with your brand. Using the Canva integration in Fanbooster, anyone can make high-quality imagery with a little practice—no design degree required.
Let us know what you think on Twitter with the hashtag #Fanboo
